Columns
 When you right click the column header, a popup menu will appear. In that menu, you can choose which columns you want shown.
Note: The column Name cannot be removed.
If you want the columns to be shown in a different order, you can drag the column headers to new positions. All columns, except for the Name column, can be dragged.
You can also sort the content of the columns by clicking on them. If you click one more time, it will sort in reverse order.
Note: Not all columns can be sorted.
Note: When you add new files, the new files will not be sorted automatically.
The columns can be dragged when there are no files in the list and when there are files in the list. But it is recommended to set up the columns before adding files to gain higher performance.
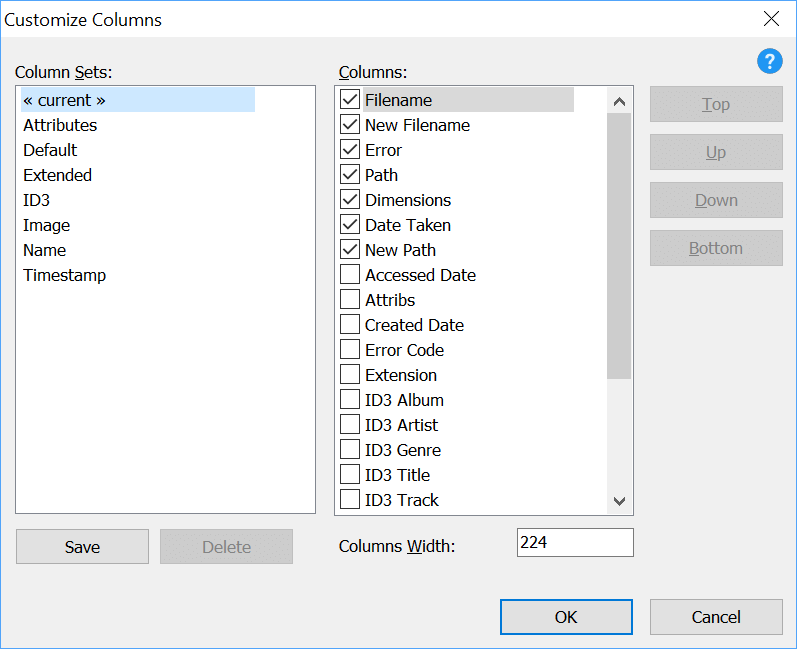
If you click the Customize item in the list, you will see the Customize Columns Dialog (shown below). You can use this dialog for easier control of the columns. Using this dialog will also increase the performance of column settings.
Use the checkboxes in the Columns List to set whether the column should be shown or not. Use the 4 buttons (Top, Up, Down, Bottom) to move the items.
Note: The column Name cannot be moved.
To the left you can choose between different predefined column sets. Click one and the settings for that column set will be shown in the Columns List.

It is also possible to use the Save Button to save a new set based on your settings. When you click the Save button, you are asked for a Column Set Name. Type a new name if you want to save it as a new set or type an existing name to overwrite an existing column set.